Saturday, August 27, 2011

Maple Pecan Scones

I've been in a baking mood recently, so this week I made Maple Pecan Scones. Mmm they were delicious!


I basically took bits and pieces from different recipes to suit the taste I wanted these scones to have...a little bit from the Barefoot Contessa and a little bit from the Pioneer Woman. Speaking of the PW, did anyone watch her new show on the Food Network???

So here is the recipe:

Scones:
  • 3 cups flour
  • 5 teaspoons baking powder
  • 1 teaspoon salt
  • 1 teaspoon cinnamon
  • 1/4 cup sugar
  • 1/3 cup chopped pecans (put a bit aside for sprinkling on top)
  • 2 sticks of cold butter (1 cup)
  • 1 large egg
  • 1/2 cup heavy cream
  • 1/4 cup maple sugar
Combine dry ingredients in mixing bowl. Cut butter into cubes.


With the mixer on lower speed, add the butter to the dry ingredients. Mix until the pieces of butter are round little pea-sized chunks.


Combine heavy cream, maple syrup, and the egg in a small bowl first and then add to the dry ingredients. Chop the pecans and add to the mixture.


 Mix on low speed until everything in combined. Do not over mix.


Flour your working surface and rolling pin. Then roll the dough out into a round about 1/2-3/4" thick and cut into eight pie-shaped pieces. (I found this trick in the PW cookbook). Alternatively, you could use large cookie cutters in whatever shape your heart desires.


Transfer to a baking sheet lined with parchment paper or a Silpat baking liner. Bake at 350˚F for 22 mins or until the tops begin to brown. When they are finished, transfer the scones from the baking sheet to a cooling rack.

Maple Glaze:
  • 1/4 maple syrup
  • 1 tablespoon brown sugar
  • 1/2 teaspoon vanilla extract
  • 1/2 cup powdered sugar
  • A pinch of cinnamon
Combine maple syrup, brown sugar, vanilla extract, and cinnamon in a small saucepan and stir over low heat until the sugar is dissolved. Remove from the heat and add in the powdered sugar. You may need to add a few more teaspoons of powered sugar to get it to a thick consistency. Put the glaze in the fridge for a few minutes to help it set.

Once the scones have cooled, drizzle the glaze over the tops using a spoon and then sprinkle the remaining chopped pecans over the glaze.

Et voilĂ ...the finished product!


Serve on its own, with a little jam, or if you're feeling extra sinful, topped with a little whipped cream.

Happy Baking,

Friday, August 19, 2011

Precious Little Neeva

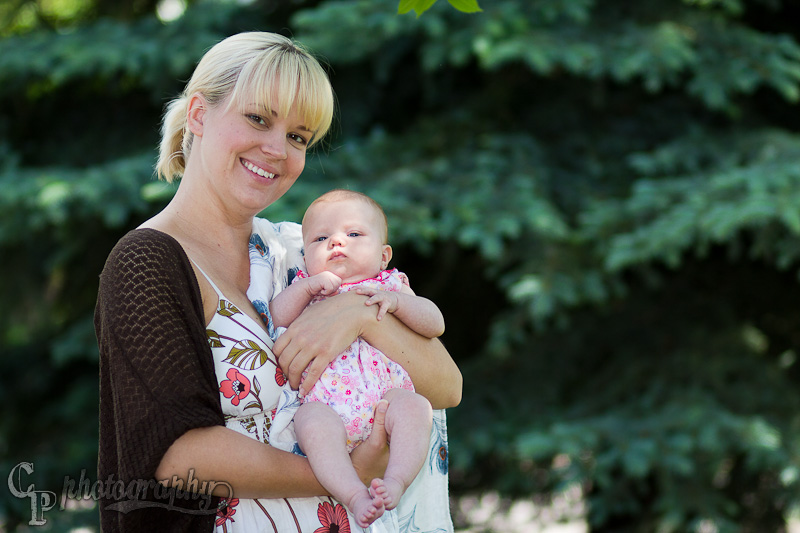
When I went back home to Canada in June, I finally met lil' Neeva, my cousin Vanessa's beautiful baby girl. We did a quick mini photo shoot and here are my favorites:


I love her little feet...
Isn't she the sweetest? <3

Friday, August 12, 2011

Peanut Butter Nanaimo Bars

After attending a MIT Canadian club event last week, I was in the mood for a Canadian-style dessert. You know what that means?.....Nanaimo bars!


There are a variety of flavors to choose from and I found it hard to pick just one. So I made half of the pan original vanilla and half peanut butter. I love any dessert with peanut butter and chocolate.

I'm not going to lie, this recipe is fairly time consuming and has quite a bit of butter. It is not something you can whip up in a hurry. It requires a lot of patience to let each layer set, but it is definitely worth it! And it's no bake and freezes well, which is always a bonus!

I used the following ingredients:

Base layer:
  • 1/2 cup of unsalted butter (room temp)
  • 1/4 cup of sugar
  • 1/3 cup of cocoa powder
  • 1 large egg
  • 1 teaspoon of pure vanilla extract
  • 2 cups of graham cracker crumbs
  • 1/2 cup of chopped pecans
  • 1 cup of flaked coconut

Filling layer - Peanut Butter*:
  • 1/3 cup of peanut butter
  • 1/3 cup of unsalted butter (room temp)
  • 1/2 cup of powdered sugar

Filling layer - Original*:
  • 1/4 cup of unsalted butter (room temp)
  • 2 cups of powdered sugar
  • 1/2 teaspoon of pure vanilla extract
  • 2 tablespoons of vanilla custard or vanilla pudding powder (I couldn't find custard powder in the US )
  • 2-3 tablespoons of milk or cream
*Note I halved each of the filling layers.

Top Layer:
  • 4 ounces of semi sweet chocolate
  • 2 tablespoons of unsalted butter (room temp)

INSTRUCTIONS:

Base layer: Melt the butter over low heat. Remove from heat and stir in sugar and cocoa powder. Lightly beat the egg and then gradually add to the mixture. Return to low heat and cook. Whisk until mixture becomes thicker. Remove from heat and stir in vanilla extract, graham cracker crumbs, coconut, and chopped pecans. Using a spatula, spread the layer evenly on the bottom of a 9x9 buttered pan. Cover the pan with plastic wrap and let it set in the fridge for 1 hour.


Since I didn't want to make two batches of bars, I separated the pan into two sections using aluminum foil. You can also line the bottom of the pan with aluminum foil, long enough to hang over the edges of the pan. (I didn't use this trick, but when fighting to remove the bars from the pan, I wish I would have).


Peanut butter filling: beat the butter with an electric mixer until it becomes light and creamy. Add the powdered sugar and peanut butter. Continue to beat until it become lighter in color. 

Original filling: beat the butter with an electric mixer until it becomes light and creamy. Beat in the powdered sugar, vanilla extract, vanilla power, and milk/cream until mixture is smooth.

Spread either filling choice over the base layer and let set in the fridge for 30 minutes.

Top layer: in a double boiler, melt the chocolate and butter. Pour the chocolate over the filling and spread. Cover and place in the fridge until the chocolate is set. (I let the mixture set over night before cutting). Cut around the edges of the pan and attempt to remove. Transfer to a cutting board (this is where the foil comes in handy) and cut into squares using a sharp knife. I cut fairly small squares because they are quite rich.

Tah-dah!


I have to say the the peanut butter bars were amazing! Pat and I loved them! They have definitely earned a place in my baking repertoire.

However, the filling on the original vanilla bars did not turn out as well as I expected. Although tasty, it seemed to be a bit too runny and did not set completely. Next time I will not half the recipe and perhaps I will be able to beat the butter to a better consistency. I would also add less milk.


Happy Baking,

Sunday, August 7, 2011

J & N Family Phootshoot

On a wonderfully sunny day in April we did a little photoshoot with our friends, Jose and Natalia and their growing family. Natalia was pregnant with Lucas at the time.

Here are some of our favorite shots (complete with princess dresses):


Cute little ladies in their princess dresses


Meet baby Lucas (taken two weeks ago):


Wednesday, July 27, 2011

La Dolce Vita

So I've been lazy and neglected to post some of the pictures from our last night in Rome as well some of the pictures of where we stayed during the week, Castel Gandolfo. So here's a little bit of la dolce vita experience in Italia...."the sweet life"

First we'll start with Castel Gandolfo, a picturesque lakeside town just south of Rome. I stayed here for my training and the majority of my two week trip to Italy. (Patrick met up with me for my second week). There are very few English speaking locals in Castel Gandolfo, unlike Rome. Here we were able to experience authentic Italian food, which was delicious! Although small, I miss the peacefulness and resort-like feel of Castel Gandolfo.

(Click on the pictures for a larger view)

Across the lake from our hotel

It was glorious to wake up to this view every morning:
Sunrise as seen from my room - Hotel Castel Vecchio
Lake view near our hotel
Piazza della Liberta in Castel Gandolfo with Bernini Fountain - Pope's summer residence in the background

Our last night in Castel Gandolfo

Quaint streets in Castel Gandolfo

Piazza and Pope's summer residence at night
mmmm.....limone gelato

View from the hotel restaurant
Hanging out on the rooftop terrace


And now on to our last night in Rome. Being that it was our last night, I wanted to experience romantic Rome. After dinner we walked around Rome to see several sites lit-up at night that we already saw in the daylight....absolutely beautiful!

We didn't have a tri-pod, so we balanced our camera on a garbage can for this slow shutter speed shot: (we make do!)
Colosseum

Roman Forum
Monument of Victor Emmanuel II

Finally our last stop of the night....The Trevi Fountain. So romantic! We sat by the fountain, people watching, while eating....you guessed it! ...Gelato!


I will leave you with these two final images from the Island of Capri. While I was in training, Pat visited this breathtaking island. After seeing his pictures I'm extremely sad I missed out. However, I WILL make a point of visiting this island when I return to Italty....so something to look forward to I guess!


Ciao,